2022年4月25日星期一

How To Prevent BLISTERS in Basketball: An All-In-One Guide

 I personally get an average span of (roughly) 1 to 3 blisters per couple of weeks, particularly when it’s the spring/summer season and our group of hoopers bang it out in the park almost ’till dark. So how to prevent blisters in basketball you ask?

Well to answer, we need to dive deep into the topic. Let’s do just that.

HERE’S WHAT YOU’LL LEARN

The truth is, no one can completely ensure there’s no chance of a blister occurring despite you taking advantage of all the tips & tricks known to mankind. But I wrote this guide to filter out some of the B.S. in the form of guessing, untrustworthy sources, or marketing to sell a product. Yes, all of this can be found when we’re talking blisters.

Let me break it down to you what I’ve learned so far myself by playing and what the research currently shows us on the annoying phenomenon of blisters: what we actually know about blisters so far, what can cause one, and what are the ways to manage them or prevent them in the future.

I’ll also give my regularly updated shoe options that I currently find to stay either blister-free or at least reduce the chances of it happening on the basketball court.

WHAT WE (ACTUALLY) KNOW ABOUT BLISTERS SO FAR

How does it form? Why? Can we treat it? Prevent it? We gotta stick to credible research & tried-and-true stuff!


How To Prevent Blisters in Basketball: InformationPin

While it’s something none of us can fully control or completely prevent, through my years of being into sports & playing basketball, I’ve noticed, tested, and researched what are usually the main tendencies that possibly cause blisters and what are some of the things we can do to help fight it.

But first, here’s a bit about how a blister forms…

HOW A BLISTER EMERGES

How To Prevent Blisters in Basketball: Blister

You guessed it – friction. Especially common among active individuals, a blister is caused by an overwhelming amount of frictional forces between the skin area and the material/object that comes in contact with it.

So, you play ball in your hoop shoes, sweat builds up inside the shoe causing even more friction and if a part of your shoe constantly rubs an area of your skin during various movements, it can potentially form a blister.

But if we’re talking specifics, a recent study on friction blisters by Robert A Schwartz, MD, MPH described the exact pathophysiology (the process of a blister creation) by having subjects rub the skin at a consistent, constant force.

Turns out, a mild form of exfoliation takes place on the rubbed area of the skin which means a layer of your skin cells (commonly dead cells) is removed and with that, slight erythema (skin irritation, reddening) also appears on that focal point of the skin.

Next, a zone of pallor (skin getting pale) forms around the irritated area, and over time, the pallor extends into the core of the erythematous skin area and this forms a blister. This results in discomfort, especially if you’re playing a sport like basketball and need to move around. Quickly.

The pale area of the skin that often looks like a bubble is the outer layer of the blister and is referred to as the roof. Peeling off the top means you’re deroofing the blister and leaving the area once again susceptible to infections and further irritation. We’ll talk about what you should with this later!

But why should we take blisters seriously? Not every human is equal and for some, a simple blister that gets infected might be very severe or even dangerous: the impetigo being the most common bacteria that forms inside blisters can turn into something as serious as cellulitis or sepsis.

WHAT’S KNOWN ABOUT THE CAUSES OF BLISTERS?

How To Prevent Blisters in Basketball: Causes

The likelihood of a blister emerging on your skin is based on the level of friction force as well as the number of times the problematic spot is rubbed against an object/material in a consistent manner.

The most problematic areas of the skin are thick, adherent areas. This means you’ll usually see blisters forming on the palms, heels, soles, and dorsa of the fingers.

Most research & studies you’ll find on blisters will be based on subjects that are in the military or they’re athletes. Both fields can be taken as great, practical examples that tell us a bit about what causes blisters and what are the main tendencies in terms of your apparel, human-specific differences, and external factors.

The same study on blisters found out that socks of different properties, the way your shoes fit, moist buildup, and even gender all have effects on the formation of blisters. Wearing socks that don’t induce as much friction against the skin proved to help decrease the chances of your skin getting irritated.

Heat and sweat build-up inside a shoe can accelerate the chances of a blister emerging since your skin can become macerated (overly softened skin), thus becoming more susceptible to friction & irritation.

However, the moisture factor is a bit of a tricky one. Moist on the skin surface can increase friction and thus possibly cause a blister while especially moist skin can actually decrease friction, creating a lubrication effect.

Some interesting stuff was also found out regarding gender-specific factors. Turns out that the female skin is naturally more sensitive to friction while it’s moist. Guys – you’re in luck with this one.

THERE’S SOMETHING TO KNOW ABOUT TREATMENT & PREVENTION.
How To Prevent Blisters in Basketball: Important

We’ll talk about the specifics of treatment & prevention methods in the later section but there’s something important to know about it first. You need to stick to proventested methods to ensure you’re not doing more harm than good.

There are a bunch of claims lurking in the realms of the Internet which may or may not help treat a blister but believe it or not, some of the stuff suggested can even be risky for your own health. Let’s talk about the stuff you should avoid before getting into the meat.

A good example would be a 1995 study on blisters by J J Knapik. It’s still widely available online and it’s actually among the first sources that appear when you look up blisters. There’s some good information there that’s still viable today but it also claims that the use of any antibiotics doesn’t help the healing of a blister in any form.

On the contrary, a recent study from 2021 has indicated that using a topical containing nitrofurazone, of which some antibiotic ointments are made, do in fact help heal a partially or fully deroofed blister. So, DON’T just grab an antibiotic thinking it’ll take care of the irritation – you must ensure you’re getting the correct ointment first.

Another good example is the use of various antiperspirants or “anti-blister” sprays as some brands love to market them. Such products are created to help lower the hydration of the skin. However, the above-mentioned study has proven that such products simply yield no evidence that they help prevent or heal blisters.

The only form of such a product that can help is foot powder.

Now that you know about the things to look out for & avoid, let’s get into the meat of the guide…

HOW TO TAKE CARE OF YOUR CURRENT BLISTER

Tested & proven methods that can help ease up your blister nightmares


How To Prevent Blisters in Basketball: Here's a Cheat SheetPin

Let’s face it – there’s no magic trick or solution to stop blisters from giving you discomfort. They don’t heal overnight either – so you’ll have to stay patient and stick to the things that can absolutely help deal with the blister. If you’re experiencing pain, or have trouble playing your sport, check out the following tips below!

The very first thing you MUST do is distinguish what you’re working with…

I. ASSESS THE BLISTER

How To Prevent Blisters in Basketball: Assess the BlisterPin

Got a nasty blister on your foot? You need to make sure it’s not infected first. While most blisters, infected or not, can be painful and cause discomfort, there are a few signs to look for to make sure you don’t have a more serious issue on your hands.

If a blister is infected, you could notice one or several of the following symptoms:

  • warmth around the area of the blister
  • iffy smell
  • pus
  • overwhelming pain
  • visible holes in the blister
  • peeling skin around the infected area

So if you’ve got any of these, I highly advise consulting a doctor for treatment since messing around with an infected blister yourself can worsen the issue and even spread the infection throughout your skin.

However, most of the time a blister doesn’t appear infected as long as you don’t turn it into one. If you don’t have any of the mentioned symptoms and it looks just like a regular blister, you have some options. The biggest question here is whether to pop it or not.

II. SHOULD WE POP IT OR NOT?

Pin

I’ve been an advocate on both sides actually but as I’ve gotten older I eventually found myself sticking to what the science/medical expertise says and that seems to be working well so far. I’m not a huge fan of popping a blister when I see one but there could be times where it’s beneficial.

Here’s the gist of it. If you’re not feeling too much discomfort and can still do your sport/activity in a full or near-full capacity, there’s simply no reason to pop it.

You’ll end up with more pain and an open wound that will need to heal over time, causing you to be stopped in your tracks because people usually tear the blister apart while trying to pop it.

However, research says it’s good to drain it but only while keeping the roof intact. This is mostly recommended if you can’t properly function and this particular blister’s very painful & causes an immense amount of discomfort.

If you pop it and peel off the roof, you’re starting at day 1 again as the healing process will be lengthened. Here’s how to drain the blister while keeping the roof intact:

  1. Make sure to start with washing your hands
  2. Take a needle and sterilize it to prevent possible infections. You can use any alcohol-based solution
  3. Optimally, find the very edge of the blister and mildly poke it in several places to break through the outer layer
  4. Fluid will start coming out – you can use gauze to help soak it up
  5. If you know what you’re using – you can apply an antibiotic ointment on the drained blister such as a nitrofurazone-based product
  6. If you don’t feel comfortable with antibiotics – simply bandage the area up with moleskin or a regular padded bandage
  7. Make sure the blister is always clean and you can peel/cut off the dead skin buildup in the coming days if it forms, and then reapply the bandage again
  8. Do this until you feel no signs of the blister affecting your foot
III. ENSURE AN OPTIMAL FIT

How To Prevent Blisters in Basketball: Fit 2

Based on various studies done as well as my own personal experience – it’s usually the shoes that are the main culprit for emerging blisters. Some of you have preferences as to how you like your basketball shoes to fit but sometimes, that can fail to align properly with ensuring less friction and ultimately preventing blisters.

So if you can’t fight off blisters when you’re active, pay attention to how your shoes fit first. You’ll want to make sure you’re feeling comfortable and secure, obviously. However, by saying comfortable, I don’t mean leaving inches of dead space and playing in a loosy goosy sneaker.

Same thing for security – a secure fit doesn’t mean an overly tight, suffocating one that ends up causing blisters rather than preventing them. You’ll want to find that in-between solution. Length-wise, leave about a thumb’s width of space up at the toes.

Width-wise, you should be feeling the material hugging your foot in a snug manner. Avoid feeling overly suffocated though. If you’re a wide footer like myself, you need to take that into account while getting a new shoe/trying to play in your current shoe.

Lastly, you MUST ensure your foot isn’t moving in the shoe at all. No exceptions. If you feel your heel popping off during certain movements, your foot is shifting forward and back, or anything along those lines – you might be in trouble. Play around with the laces and try to optimize the fit.

Remember, unnecessary & rapid movement of the skin against an object causes friction. Friction causes blisters.

IV. USE THE “BUNNY EARS” LACING TRICK

Let’s say you find your current kicks not fitting optimally. You’ve got a blister that’s annoying you but you’re not looking to grab a new pair. While adjusting the shoe’s fit won’t eliminate the presence of a blister, depending on the area it occurred on, it absolutely CAN help deal with it easier.

Let’s say you’ve got a blister on your toe or any area at the front of your foot for that matter. Try out MRFOAMERSIMPSON’S lacing technique! He calls it the “bunny ears” and having tried it myself (mostly to reduce heel slippage on certain shoes), I absolutely find value in it for a handful of sneakers.

Here’s how to perform this method:

  1. Lace the shoe up like you usually do but leave out the top eyelet
  2. For the top eyelet, drive the laces through from the opposite side this time
  3. This will create bunny ears out of your laces at the top
  4. Cross the laces together and finish lacing up the shoe up like you normally would

This will lock you down even further and drive the heel back to improve the overall experience and possibly reduce any fit imbalances you might’ve had inside the shoe initially. This might reduce discomfort at the front portion of your foot if there’s a blister there. The least you can do is try it out – it’s free.

V. CHECK YOUR SOCKS

How To Prevent Blisters in Basketball: Socks

If your shoes are all good, the next step is socks. First, make sure to fix any bunched-up spots, fix up any loose areas. Also, remember that moisture inside the shoe = friction more easily irritating the skin, so you’ll want to swap out a moist pair of socks to a dry pair to not worsen your blister.

If the blister is bothering you, double up your socks for more padding as that will act as protection against further friction. Ideally, a thin polyester sock should be underneath a thicker performance sock or a wool-based sock.

The use of acrylic socks has been proven to cause the least friction, so if you have those – put those on and protect your feet against additional discomfort.

VI. PADDING TO STAY PAIN-FREE

How To Prevent Blisters in Basketball: Hydrocolloid DressingPin

A painful blister can be hard to deal with, no matter what socks or what kind of shoes you’re wearing at the moment. If I’ve got a game that day and my blister still hasn’t healed up properly, I usually pad them which helps a bit. Not a lot in terms of feel but this ensures the blister won’t get infected and its healing process won’t be hindered as much.

If your blister is still intact and has a roof – moleskin bandages/pads will do the trick best. You can also get some of those “blister pads” some companies make but they’re more marketing than something actually catered towards managing blisters. You’ll usually find standard, well-padded bandages if you get one of those.

If your blister is damaged or deroofed – you’ll need to treat it as an open wound. Apply an antiseptic to prevent any infections and pad the area with a hydrocolloid dressing. Those are found to be the most effective in accelerating the healing process & relieving some of the pain.

If you’ve got a toe blister – look for padding in the form of toe caps. You can also find those in the form of moleskin.

VIII. DRY YOUR KICKS

How To Prevent Blisters in Basketball: Dry Your ShoesPin

Something I’m sure a lot of people still overlook. Before and after each and every session, I highly recommend ensuring your kicks are fully dry. We don’t want to begin with a footprint of moisture as that’s a recipe for disaster. I always dry my kicks in the balcony with the windows open to let the fresh air do the work.

A simple tip but something you should get into the habit of doing if you haven’t already.

IX. SHOES ARE TOO STIFF? IT’S TIME TO SWITCH

How To Prevent Blisters in Basketball: ShoesPin

Lastly, let’s go full-circle and go back to the shoes. You can try all the methods in the world in the form of socks, padding, you name it. But if your shoe is causing the discomfort and there’s not a lot you can do about it – it’s time to switch. Your wallet will have to handle the load here but your feet will most definitely thank you.

Avoid playing in overly stiff shoes if you’ve already got a blister as that might worsen the issue. Leathernubuck, or stiff synthetic-based builds that don’t move much with your foot isn’t a good idea when you’re dealing with blisters.

Also, if you’ve got a brand new pair just recently but got a blister that’s bothering you – I highly suggest waiting ’till you’re all healed up. Breaking in new shoes can sometimes be an uncomfortable and even lengthy process and that won’t do wonders for your skin irritation.

HOW TO PREVENT BLISTERS IN BASKETBALL

Your go-to plan to reduce the chances of blisters in the future


How To Prevent Blisters in Basketball: Your Future Anti-Blister PlanPin

Let’s talk future blister prevention. The same principle stands – there’s no way to fully prevent them but you can do a handful of things to ensure your foot is in the best possible position in terms of preventing blisters.

Let’s start with something simple but VERY important…

I. THE BREAK-IN. DON’T FORGET IT

How To Prevent Blisters in Basketball: The Break-In

No basketball shoe starts at 100%. Kicks utilizing raw materials such as leather or suede will need a good amount of time to feel as they’re intended to feel because those materials need to be broken in so they can properly mold to your foot’s shape and move better with your foot.

Because of this, the first couple of weeks can feel questionable in a brand new pair of sneakers. What does this have to do with blisters? Quite a lot, actually. It’s all about awareness here – don’t panic if things are uncomfortable at first.

Don’t push yourself too hard in a new pair and gradually increase the load. This will reduce the chances of your skin getting irritated due to stiff materials not budging when you move. If you’re just coming off of a freshly healed up blister, I don’t personally recommend breaking in new shoes, especially if they’re built with a lot of structure.

If you don’t have a =nother pair that’s broken in – that’s fine. Just be careful, don’t push too hard too soon, and use the tips below to ensure you’re doing everything you can!

II. LOOK FOR AN OPTIMAL FIT

How To Prevent Blisters in Basketball: Fit

Once again, you’ll want to make sure the shoe fits you properly. It should feel snug and secure but not overly tight to cause suffocation for your feet. Ideally, you’ll want to end up with a thumb’s width of space for your toes length-wise.

Width-wise, there should be minimal-to-none extra space and no side-to-side movements.

Your foot SHOULD NOT move inside the shoe – if it does, this will cause additional friction. If you’re having trouble achieving such a fit, use the earlier-mentioned “bunny ears” lacing trick to shift your heel to the back of the shoe and improve the overall fit.

I personally tend to get the most blisters when I’m playing in a shoe that causes my foot to slightly shift forward upon certain movements. This results in toe bumps and my toes feeling banged up after a session and also additional friction that irritates the skin.

I LOVE playing in the classic Dame 3 and also the new Curry 9 Flow but ironically, those two shoes have been causing blisters for me quite often since I get a lot of toe bumps in ’em. I still play in those and I do think those are fantastic on-court performers but they’re also good examples of what you should avoid when preventing blisters.

III. AIM FOR FORGIVING MATERIALS

How To Prevent Blisters in Basketball: Forgiving Materials

If a shoe is properly fitting you, it’s broken in and you’re still getting tons of blisters – chances are your skin is more sensitive and prone to irritation when moving against a rough surface.

You want to ensure you’re doing everything you can to combat this, so for your future sneakers, opt for builds utilizing softer, more “forgiving” compounds. Knits, wovens, thin mesh materials, and soft fabrics/textiles are all viable options to minimize the impact of rough collisions against your skin.

It’s no coincidence I usually have the least amount of trouble regarding blisters and even general foot fatigue after playing in a basketball shoe that fully represents the modern era of shoe design. Nike’s Flyknit & Flyweave, adidas’s Primeknit or PUMA’s evoKnit are all great examples of a true modern hoop shoe.

The Curry 8 Flow wouldn’t be a great example even though it’s a knit-based build. The movement inside the footbed & toe bumps make it a tough sell for someone who’s blister prone but you get the idea.

Check out my most comfortable basketball shoe list to get an idea of minimal & “forgiving” builds

IV. SOCKS ARE IMPORTANT

How To Prevent Blisters in Basketball: Acrylic Socks

Another critical factor that has to do with blisters forming is socks. There have been various studies done on the effect of different material socks and their relation to the possibility of blisters. Mostly tested on athletes and military personnel, it has been found out that acrylic socks tend to cause the least friction with the skin.

If you’re playing ball, chances are you’re aware of performance basketball socks. Most of ’em actually do a solid job of wicking away moisture, keeping the foot dry and friction-free. However, you’ll still want to ensure you’re getting fairly thick, moisture-wicking socks that don’t move against your skin while playing.

Like a lot of hoopers, I found Nike’s Elite socks to be among the most comfortable and effective in wicking away moisture & staying comfy. Under Armour’s HeatGear stuff is also solid.

If you’re getting ready for a long, hardcore session and you’re prone to getting blisters, doubling up your socks is a good idea. The formula that usually works best is you’d slap on a thin pair of polyester socks as the first layer and then a pair of your usual performance socks OR thicker wool/polypropylene socks as the second layer.

The key is having enough padding to protect the skin from getting irritated as well as wicking away excess moisture. Always think about these two factors when choosing socks.

Use acrylic or Nike Elite socks for less friction. You can also double-up your socks with a thin polyster sock under a thicker wool/performance sock.

V. PADDING IS YOUR FRIEND

How To Prevent Blisters in Basketball: Padding 2

You don’t have to have a blister to take advantage of padding. Everyone who’s prone to blisters can pad areas that are the most likely to get irritated: soles, balls of the feet, toes, heels.

I’m not saying you should have your foot wrapped up in 20 bandages each time you play but proper padding definitely reduces the chances of nasty stuff happening. Especially when moisture comes into play.

So if you’ve recently had a blister on your sole – apply a bandage on it before you play, as well as several other areas that could be prone to such issues. Once again, you can use blister pads, moleskin bandages, moleskin toe caps, or use hydrocolloid dressings if you’ve got a deroofed blister.

VI. ENSURE DRYNESS (along with making sure to dry your shoes & socks)

How To Prevent Blisters in Basketball: PowderPin

A lot of products that are marketed as “anti-blister” attempt to decrease the hydration of the skin to prevent moisture build-up. Based on the study I’ve talked about earlier, turns out the only products that actually have a positive effect are foot powders.

Talcum powder and corn starch work best to keep your foot inside the sock dry and avoid possible blisters. So, before an active session, apply some powder on your feet. Don’t be afraid to put a lot of it since it can only help. Then you can put your socks on and add some more powder on the socks as well.

Aside from the use of powders, you’ll of course want to make sure you’re always playing in dry shoes & swapping moist socks into dry ones (if you can) to keep things optimal.

VII. REDUCE FRICTION

How To Prevent Blisters in Basketball: VaselinePin

Remember what we talk about earlier – moisture can have a negative effect while trying to fight blisters but an extensive amount of moisture can temporarily help as lubrication is a direct antidote against friction. The best product for lubrication is still petroleum jelly. Yes, that means go grab some vaseline.

Before a session, apply some petroleum jelly on areas that collide with your shoes: heels, toes, soles, sides of the feet, etc. You don’t want to go overboard with vaseline though and avoid using it for many hours per day on a regular basis.

Why? Remember what we learned from the studies. Skin maceration isn’t a good thing when it comes to blisters – friction will become even more of an enemy in such a case, so make sure you’re not constantly marinating your feet in vaseline as the method can become less and less effective that way.

VIII. A CUSHIONED INSOLE CAN HELP

How To Prevent Blisters in Basketball: Insole

How does cushioning help prevent blisters? It’s fairly simple and it helps in two ways.

One, evenly distributed cushion for a foot means that it can take some pressure off the blister and distribute it across the whole foot. Today’s performance insoles are made with this in mind – the cushioning doesn’t just compress and spring back into place.

It actually spreads the load evenly across the foot while compressing and that’s a win when you’re trying to avoid blisters. No single peak pressure point becomes susceptible to blisters as you’re spreading the force across the whole area.

Two, insoles that offer cushion can help absorb shear so that your skin won’t have to handle all the load. You can read about the effects of shear modulus here.

With all that said, you don’t want to have too much cushion underfoot as that can affect performance and the mechanics of your movements. 99% of basketball shoes today already offer cushion but it’s still a good idea to grab an aftermarket insole and put it in in case your current shoe might be a little lackluster in this department.

I recommend Spenco insoles. For best cushioned basketball shoes, check this list

BEST BASKETBALL SHOES FOR THE JOB

The hoop shoes I’ve been playing in lately that cause the least hassle


How To Prevent Blisters in Basketball: My Current Shoe Top PicksPin

Time to talk about some shoes! I thought it would be helpful to share some of my current favorites I’m playing in that don’t usually cause blisters. While I am using some of the methods I’ve talked about myself, it’s the shoes that have a huge effect on the task at hand.

Now, this doesn’t mean these three shoes will guarantee you won’t get any more blisters from now as everybody’s different, I still want to share what currently works really well for me.

I’m sure at least one of the options could help you out and if not, these are also good examples of what you should be looking for when getting a new pair in terms of decreasing the chance of blisters.

I. NIKE KOBE A.D. NXT 360  $200

How To Prevent Blisters in Basketball: Kobe AD NXT 360

The very first shoe that came to my mind is the awesome Kobe A.D. NXT 360. It’s a pricy one but if you can get your hands on it – you’re in for a treat.

360 degrees of Flyknit all over the shoe is there to greet your foot. Inside, outside, it’s everywhere. I love this minimal, ultra-lightweight build that’s buttery soft for my foot once the material wrapped around it in a few days. No hotspots, no pinching, no movement inside the shoe, none of that nonsense. Just pure comfort.

For cushion, there’s a removable React & Lunarlon midsole which is very well-balanced so chances are you won’t need an additional insole for this one. I’m low to the ground, quick but also well-cushioned. A fantastic setup for most guys in my opinion.

The rest of the shoe is stellar as well: good traction, extremely lightweight support, and a premium build. I don’t recommend taking these outdoors too often though and for heavy/explosive players, you might need something with a bit more structure.

II. NIKE LEBRON SOLDIER 13  $140

How To Prevent Blisters in Basketball: LeBron Soldier 13

LeBron’s secondary signature line is consistently putting out solid well-rounded performers and I found myself returning to the 13th Soldier shoe the most often.

While it might not ideally fit all anti-blister criteria on paper as this build isn’t among the softness or thinnest, the fit I always get with these is no short of perfect. A near one-to-one fit with my foot, spectacular foot containment no matter the movement, and once I pull those straps, it’s game over.

For cushion, we’ve got Zoom Air units in the heel and forefoot and even though they’re not anything special, they get the job done in providing moderate impact protection & enough comfort to feel confident on the court. Never got a single blister on my soles in these, so I’ll take it.

The LeBron Soldier 13 also has great traction that’s viable for outdoor play, unmatched all-around security, and a structured ripstop fabric build.

III. NIKE LEBRON 16  $185

How To Prevent Blisters in Basketball: LeBron 16

Another LeBron shoe but this time, let’s shift to LeBron’s main signature line and the year 2018 when this one launched. No issues in the fit department: a snug fit that’s not overly tight but locks my foot in very nicely. The upper utilizes Battleknit 2.0 which is a structured knit material. Super comfy, no painful collisions with my foot either.

For cushioning, here’s a beefy setup for ya: full-length Max Air along with a bunch of articulated Zoom pods under your foot. This is literally running on a bouncy mattress so you won’t need an insole for this one. But the awesome thing is, these still feel well-balanced. I was never sluggish despite having lots of cushion.

The LeBron 19 also boasts fantastic traction and it’s currently among my favorite outdoor choices! Great support too, without overly restricting you. And as I always mention, Battleknit 2.0 is probably the most durable knit-based material I’ve seen on a hoop shoe. Or at least one that crosses my mind first.

YOUR SHOE KNOWLEDGE CONTINUES!

There’s always more to know & take advantage of: dive deep into the guides!


How To Prevent Blisters in Basketball: More Shoe Knowledge Awaits

Now that you know all about blisters – your shoe knowledge journey continues! There’s so much misleading information out there that is either based on marketing and selling a product or based on bro science & myths that are still taken as legit information in the sneaker world.

I try to do my best in filtering out the B.S. and giving my personal, research, and experience-based insight that I’m sure would help out one or two of you. So if you’re feeling it, I urge you to check out my other shoe guides & best shoe lists in topics that I believe are the most important to know about.

2022年4月24日星期日

How to Break In Basketball Shoes Easily: A Hooper’s Guide

 There’s hardly a more annoying experience than receiving your new shiny pair of hoop shoes just to find out they’re suffocating, pinching, and causing a nightmare for your feet. Don’t throw ’em out yet – here’s my personal guide on how to break in basketball shoes quickly & easily.

But what does even breaking in a shoe mean? Can you even do something about it to make the shoe fit better RIGHT AWAY? How about shoes that go easy on you and don’t require a painful adjusting period? Let me break down all that I learned through the years of hooping in dozens of sneakers while also being a wide footer.

I. BREAKING IN A SHOE? WHAT’S THAT?

For those new to the game – let’s go over what breaking in a shoe even means & why should you care

How to Break In Basketball Shoes: The Definition

So, you grab a new pair of sneakers, get your usual size and soon find out they’re overly tight, uncomfortable, and even unbearable the moment you put them on your feet.

Well, that’s not an immediate indication that you should return them. Most of the time, this means these shoes need some break-in time before they can feel optimal for you.

Provided that there are about 0.3-0.5 inches (depends on how much you prefer) of space for your toes, there’s enough space for the foot to sit inside the footbed width-wise and things aren’t too crammed height-wise, there’s no need to panic if things aren’t comfortable at the moment.

HOOP SHOES MIGHT GIVE YOU SOME TROUBLE

This is especially true for basketball sneakers. Why?

Basketball footwear is among the most well-structured models out of the entire sports shoe catalog. Hoopers need stability, support, shock absorption, and traction altogether, as every second counts on the court.

This is why a good portion of hoop shoes utilize upper materials that are reinforced with additional synthetics or sturdier compounds, rigid support chassis systems such as torsional or lateral plates, and sophisticated cushion compounds that are made up of foam, polyurethane, and other resilient components.

Because of the usually beefier construction that basketball shoes take advantage of, our out-of-the-box experience with a new pair can sometimes seem misleading.

The upper could feel suffocating due to the materials that aren’t yet stretched out, step transitions could seem choppy due to plastic components of the shoe not broken in yet, and even the shoe’s cushioning that’s supposed to be nice and bouncy feels stiff and dead during the first few days of action.

This is what the break-in process is all about.

You need to give a new shoe the proper time to adjust to your foot shape and let all of its components mold and start moving better with your foot. It’s okay for some shoes to feel a shell of themselves at first.

A NEW ERA IS HERE, AND FOR THE BETTER

One thing I must mention is that things are much more peachy than they used to be several years back.

The modern era of performance footwear has been gradually evolving and today’s sports sneakers are all about offering the most performance & comfort in as light of a package as possible.

What does this mean? It means that even basketball shoes have become drastically lighter, more flexible, and more comfortable all while still providing the critical features for the player.

Near-paper-thin synthetic materials are now the go-to, and brands are making an effort to get rid of as many unneeded features as possible in order to shed weight and increase mobility.

You’ll rarely see a full-on leather basketball sneaker these days, or any raw material as the base for that matter.

Because of this, we don’t need to suffer for months and months before a shoe starts to feel optimal on our feet anymore. Things are much faster, easier, and more straightforward.

Sure, there can still be instances where a particular model will feel off for quite a while but those days where that’s typical are gone. A few days will almost always be all that you’ll need before you can hoop at your full potential.

So, the chances that you’ll even need to prepare yourself for a break-in period are much smaller these days. Overthinking your decision before buying isn’t going to be needed these days, so don’t worry.

II. WHAT AFFECTS THE PROCESS

Here are the main factors that can greatly affect the duration and intensity of a shoe’s break-in period

How to Break In Basketball Shoes: The FactorsPin

Despite modern sports footwear giving us less trouble these days, there are still several factors that decide how long and intense the break-in period will be.

It’s virtually impossible to accurately predict such measures but it’s good for you to be aware of the things that can impact your first few days or weeks with the sneaker. Let’s quickly go over them.

THE BUILD

The construction of the shoe is the biggest defining factor for your break-in process. Duh.

Ask yourself what kind of materials does the sneaker utilize? If there are a lot of raw compounds such as leathernubuck, or suede – things will take some more time. But then again, you’ll rarely come across such a shoe these days.

If you do – take into account that certain leather models, for example, can be quite stubborn and can take as much as several weeks or MONTHS before starting to feel the way they should.

On the contrary, take lighter synthetics such as knitswovens, and jacquards and the process becomes almost instantaneous with some of those shoes even feeling a-okay right out of the box. This is now quite common.

But it’s not all about the uppers.

Other areas of the shoe such as the midsole, outsole, and support components all need some time before everything starts flowing together smoothly.

Support plates could feel stiff at first, cushioning systems might seem not plush enough vs. how they were advertised and even the shoe’s traction could seem subpar.

Most of the time – this is all normal.

Plastic components take a while to soften up and start moving better with the foot, foam compounds used for cushioning also need to heat up to start properly compressing, and a lot of rubber outsoles on hoop shoes these days need to be worn for a bit to become more flexible and cover more ground, thus provide better grip.

In essence, the more stuff your shoe has, the longer it will take for everything to start feeling right.

THE FOOT

If you’ve got a wide foot as I do – things could be a bit more complicated.

An average basketball shoe isn’t particularly built with wide footers in mind, so the initial experience with a shoe for me is usually different from the one for a person with a more common foot shape.

My foot is also fairly thick with a tall midfoot bone – that doesn’t make it any easier. So, you’d imagine I don’t exactly have the best time when shopping for a shoe that I know won’t fit as well as it would for someone else.

I encourage you to check out my list of the best basketball shoes for wide feet – that’ll get you started if you’re part of the club.

But despite having a thicker foot, you should still give a sneaker some time (even more than usual) before deciding it’s not for you.

I’m speaking from experience – most shoes that aren’t exactly made for wider feet end up just fine if I’m patient and can live with the discomfort for a couple of weeks.

THE COURT

The level of abrasion of the court you’re playing on can impact how quickly the shoe will be broken in.

If you hoop indoors on a classic hardwood surface – the outsole, midsole, and even the upper will take a bit more to start budging as opposed to hooping on an outdoor concrete surface.

A more abrasive surface such as the beloved blacktop will result in the shoe’s outsole rubber starting to mold faster, and the midsoles will need to absorb more force, thus you’ll start feeling the feedback quicker.

Of course, there’s also the durability factor as any shoe will wear out faster outdoors than indoors. But if we had to compare where most of the components would break in faster – a less forgiving surface such as concrete would be the answer.

THE PLAYER

The way you play will also decide how much your shoe needs to work to keep up. This obviously ties into how fast it’ll fully break in and start feeling comfortable.

It might be a good idea to take it easy and do some light work at first as you’re not yet sure if this exact sneaker is even for you.

But as you get used to them, your play style and tendencies will help determine how stubborn the sneaker really is.

If you’re someone like me, who’s an aggressive slasher to the rim and who definitely plays with explosiveness – you’ll get a feeling of the shoe quite quickly.

However, for guys that take a slower, more methodical approach to their game or just wear the shoes for casual shootarounds – it’ll take a bit more time to stretch things out to a degree.

III. HOW TO BREAK IN BASKETBALL SHOES EASIER

If you’ve got a stubborn pair of kicks – don’t panic. Here’s everything you can do to make the first days smoother

How to Break In Basketball Shoes: Skip the PainPin

Despite the performance footwear market’s shift to lighter, thinner, and more comfortable as the focal points – chances are you’ll still come across a desirable sneaker that will give you trouble.

There are some things you can do if the experience is too much for you for one reason or another.

Let me give you my best recommendation of what to do if the break-in process of a shoe is a bit too harsh. I got a tip for each scenario going from just a bit of discomfort all the way to the shoe being unbearable for you.

ARRIVE READY

Sometimes, all a shoe needs is a few hours. This is especially true for today’s models as all they really need is some heat and a few wears for the materials to adjust.

So, if you’re feeling near-optimal but things could be a tad bit better – simply arrive at your practices or scrimmages with your guys with the shoes already on.

The 20-30 extra minutes of headroom each day before playing could mean a whole day of break-in time while playing is sliced off the to-do list.

TRAIN, NOT PLAY

If you’re just feeling a little bit of tightness but you can still play somewhat comfortably – there’s really no need to do much.

If you’d like to save basketball action when the shoe has been fully broken in – do other physical activities with the shoe for the first few days. This will accelerate the process and the sneakers will be ready to rock ‘n roll when it’s game time.

WEAR DOUBLE SOCKS

You can always slightly speed up the process by wearing two pairs of thicker socks. Performance socks are your best option to prevent blisters and keep moisture in check but virtually any sock will do.

Wearing double socks means that the upper will undergo a bit more pressure even when you’re idle, so stretching out the upper will be a bit faster.

WEAR THEM CASUALLY

Perhaps the discomfort you’re experiencing is a bit too much for you when we’re talking about physical activity? Wear them casually.

Don’t worry, nothing will happen to your hoop shoes even if you take them to the city, sidewalks, or dirt pathways. Just make sure to clean them out before playing basketball to make sure the traction is ready.

Walking in a shoe casually for a couple of days might not fully break in some shoes but you’ll definitely get a head start.

KEEP ‘EM ON AT HOME

I had instances where a new pair of tennis shoes were so damn tight, that I could barely move in them without feeling pain on the sides of my boat-like feet. This is where wearing such a pair at home comes in handy.

I walked around the house as I normally would, just with the shoes on. I hated it but it was much more endurable than running and jumping on the court.

I did this for a whole week and definitely felt a difference when it was time to try them out for some action. I did train in them about 3 days after purchasing and those first 3 days definitely helped kickstart the adjusting period.

COMBAT ANY GLARING PAINS

There can also be instances where you got the size right, it seems like the foot is compatible with the shoe but there are still several hotspots that are hard to deal with.

This doesn’t always mean you need to play with the shoe some more. Sometimes, certain components are implemented in a way that your foot doesn’t align with them properly.

If you really like the shoe and not looking to put it in your closet to collect dust – there are some things you can do.

For heel pain or slippage – most basic heel protectors can go a long way. Check some of those out on Amazon.

Pinching or digging can happen basically anywhere, so you can take advantage of moleskin bandages on the areas that are problematic.

For foot sole pain or arch pain, aftermarket insoles/midsoles could be your friend. This is a pretty sophisticated topic that needs more detail but my list of the best basketball insoles is a good start.

USE A SHOE STRETCHER SPRAY

I’ve found out about this just recently and it impressed me. Shoe sprays (for whatever purpose) always seemed gimmicky for me as they would usually do more harm than good in the long run.

However, I’ve found a couple of brands that seem to have excellent user reception. Yes, you heard it right – shoe stretcher sprays.

FootMatters make a quality stretch spray, and so does Instant Comfort. You can find sprays from both of these brands on common marketplaces like Amazon or Walmart.

For those unbearable situations where you can barely put the shoe on and move (although it’s very unlikely it would happen nowadays), get yourself a spray, soak the insides of the shoe and leave it for a few hours. Repeat the process if the results are not yet optimal.

Be careful with these though – use them only when you need them as some of these sprays can contain harmful ingredients that could damage the materials of the shoe when used inappropriately.

VISIT A SHOE COBBLER

Honestly, if the only remaining option is the help of a shoe cobbler to forcefully stretch out the shoe, there’s a pretty good chance the shoe isn’t for you.

I had these cases where the pair I so desperately wanted ended up just not working for my wide feet and even though I didn’t bother going to a specialist, perhaps you will.

Most materials that are found on modern air jordan aren’t very cooperative when it comes to artificially stretching them out. Fabrics can easily tear or become too flimsy due to over lengthened grain.

However, if you’re looking for help with a more traditional build such as leather or nubuck – you should be able to tailor it to your foot with the help of an expert.

IT MIGHT NOT BE A SHOE FOR YOU

If everything fails and the shoe simply refuses to befriend your feet – you have to know the time when to stop and look for a different pair.

A modern basketball shoe that mainly utilizes synthetic materials shouldn’t give you trouble if you’ve been hooping in them for months. Things were different back in the day, but now, I give most sneakers a month to see if it’s for me.

If I’m still feeling overly suffocated, there’s too much pinching or anything of that nature all these weeks later, it’s probably just my wide feet that are incompatible.

IV. SHOES FOR A HASSLE-FREE EXPERIENCE

For those looking to skip any hassle and just hoop – I’ve got some awesome options for youHow to Break In Basketball Shoes: The Shoes

Alright, let’s talk hoop shoes.

While the market nowadays is more forgiving than it used to be in the matter of breaking them in, let me give you some examples of recent shoes I played in that gave me minimal-to-zero trouble even during the first few wears.

If you’ll be looking for that broken-in feel right out of the box, look for a shoe that has a synthetic (preferably knit or woven) build, a wider forefoot portion if you’re a wide footer and a generally minimalistic design.

Remember, the fewer features and bulk the shoe has, the less hassle you’ll have to go with.

Here are a few shoe models that impressed me in this matter: I extensively played and tested all of them, and they’re all great all-around performers.

NIKE KOBE A.D. NXT 360

FULL REVIEW $200  7.8/10

For what many called a next-gen basketball shoe when it launched – the Kobe A.D. NXT 360 is the pinnacle of comfortable right out of the box.

The shoe features a pure knit upper, or 360 degrees of Flyknit as Nikey claims. It’s a glove for your foot – there’s really no better way to describe it. The material is soft, lightweight, stretches out to one’s foot almost right away, all without overly stretching as that would compromise containment.

If you can find it today for a good price (GOAT and StockX will be your options), it’s a great wide footer’s choice and also a very solid all-around performer. Traction was solid on all surfaces, and the drop-in midsole offered an extremely pleasant ride underfoot.

It’s a premium shoe – no other way around it.How to Break In Basketball Shoes: Curry Flow 9

UNDER ARMOUR CURRY FLOW 9

FULL REVIEW $160  8.6/10

The Curry Flow 8 started a breakthrough to what we now call a running sneaker for basketball. It’s really how the improved Curry Flow 9 feels and performs, and for the better.

The shoe features a bit more structured throughout the build compared to its predecessor but the mesh + nylon combo still didn’t give me any trouble. A few wears were all I needed to fully get used to this formula of a sneaker.

The Curry Flow 9 is also a very solid option for wider feet due to its spacious toebox. You’ll also get deadly traction that’s all foam and no rubber, balanced Flow cushion with some of the smoothest heel-to-toe transitions EVER, and lightweight support.

Just be aware that this outsole entirely made of foam needs a few hours to heat up in order for the thread to start moving better and covering more ground. This is why traction might feel mediocre at first (especially indoors).

How to Break In Basketball Shoes: Harden Vol 4

ADIDAS HARDEN VOL. 4

 $130  8.4/10

The 4th Harden sneaker is still among my favorite hoop shoes to play in, no questions asked. It’s a near-perfect low-top and also a solid option for those not looking to spend too much time while experiencing discomfort.

This is because the Harden Vol. 4 comes in several upper variants. I recommend going with the knit + synthetic leather variant for best results. Don’t worry – the leather portion is only on the toebox for added strength since it’s a high-wear area.

The shoe is fairly wide, so, once again, it’s a decent sneaker for wide footers, and it’s a BEAST when we’re talking performance. Traction that’s outdoor-ready, amazing Boost cushion for unparalleled balance, and fantastic support even for a low-cut shoe.

Forget about high-tops: those days are over.How to Break In Basketball Shoes: Cosmic Unity

NIKE COSMIC UNITY  FULL REVIEW

 $150  8.4/10

One of the more well-rounded basketball shoes from Nike that isn’t a signature model. What might seem ordinary for some, non-signature kicks from the Swoosh don’t usually outperform the flagship models endorsed by athletes.

The Nike Cosmic Unity come out a few years ago but it’s still a stellar shoe. It features a knit upper that’s partly made out of recycled content, it’s wide-footer friendly and I remember I did feel a little suffocated for the first couple of weeks but the majority of reviews from non-wide footers didn’t experience that at all.

While you might need a day or two to feel a full 100% rather than 95%, the Cosmic Unity shouldn’t give you too much trouble.

Traction was great right out of the box, the full-length Zoom Air cushion was fantastic, they were stable and not too clunky, nor too flimsy. These felt just right. Definitely one of the better hoop shoes from Nike.

As a side note, some people have reported having some heel slippage but most cases seemed to go away after a short period.

V. HOW TO BREAK IN BASKETBALL SHOES: CONCLUSIONS

Let’s close the show: here are the main keys to remember on how to break in basketball shoes

How to Break In Basketball Shoes: The TakeawaysPin

Let’s wrap things up.

Now you know that you shouldn’t dread the break-in process of any shoe, and even more so today as the shift from heavy, bulky leather Jordan Retros for the court went away long ago.

Just make sure to be aware of your foot shape, and understand that not ALL shoes will be for you no matter what methods you use to attempt to make it for you.

Reading detailed shoe reviews before a purchase is definitely the smart thing to do as reviewers like myself always describe the fit of the shoe, so you roughly know what to expect. You should also know your regular size for each brand.

KEY TAKEAWAYS

Here are the main things to remember on how to break in basketball shoes:

  • there’s no need to come to immediate conclusions if a shoe doesn’t feel quite right out of the box
  • basketball shoes these days are much easier to break in as some of them already offer a broken-in feel due to modern materials
  • there are several factors that affect the duration and intensity of the break-in period. Your foot type; the materials of the shoe and the number of features implemented; the level of abrasion the court you play on has, and even your play style
  • depending on the severity of your situation, there are a bunch of things you can do to make the adjusting period easier & quicker. They include wearing double socks, using the shoes outside of basketball, applying shoe stretcher sprays, and visiting a shoe cobbler if all else fails
  • to avoid an ugly break-in process, I gave you a few shoe examples that don’t require any hassle right out of the box. They are the Kobe A.D. NXT 360, the UA Curry Flow 9, the adidas Harden Vol. 4, and the Nike Cosmic Unity

2022年4月20日星期三

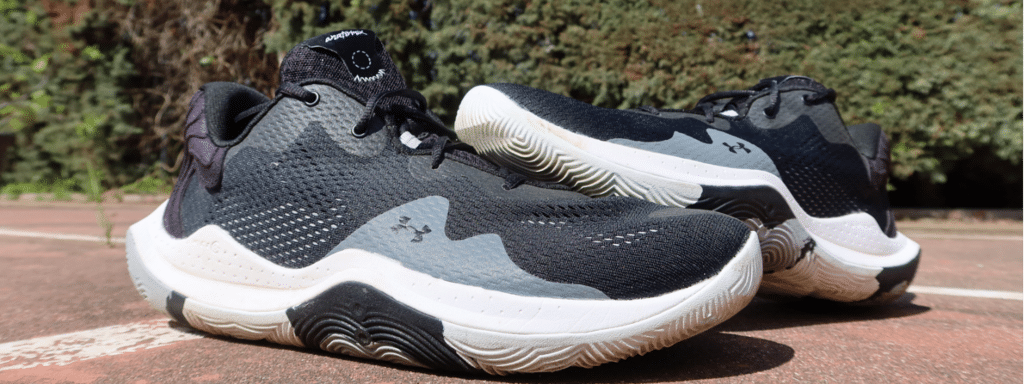
Under Armour Spawn 4 Performance Review

 Back when I played in an organized league before I knew much about performance features in footwear, I would always buy two shoes every season: one budget model to destroy in practices, and one flagship-style model to use in games. I always loved when the budget model outperformed the flagship model. When I first tried on the Under Armour Spawn 4, my first thought was, “this feels like one of those shoes”.

The Spawn 4 is such a guard-specific shoe, that I found myself trying to be more shifty and explosive on the court when I played in them. I felt more nimble and elusive while playing with the Under Armour Spawn 4, which I have to say, I enjoyed.

And, because they had that budget or team feel to them, I had no remorse in being rough with them.

I should also mention that Under Armour changed very little from the previous model, the Under Armour Spawn 3. Same cushion setup, same Anatomix construction, same traction pattern. So if you liked that shoe, you will enjoy these.

Under Armour Spawn 4

Colorway: Black / White

Release Date: 2022

Style Code: 3024971

Price: $110

Under Armour Spawn 4 Traction

Under Armour Spawn 4 traction

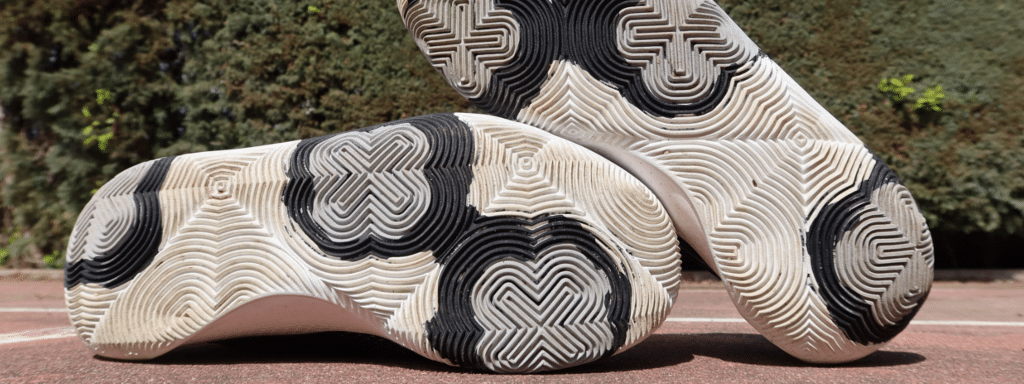
The Under Armour Spawn 4 features a radial traction pattern, in two different shapes. Most of the sole features a square wave pattern, but there are several targeted points that feature an X-shaped, black, and grey, traction pattern. The traction worked very well both indoors and outdoors with no slippage nor dust build-up.

One thing to take into consideration is that the rubber compound of the sole is on the soft side. I wore the Under Armour Spawn 4 sparingly outdoors, and I can already see some wear. It’s not the softest rubber I have ever experienced but it’s definitely not the most durable either.

Under Armour Spawn 4 Cushion

Under Armour Spawn 4 cushion

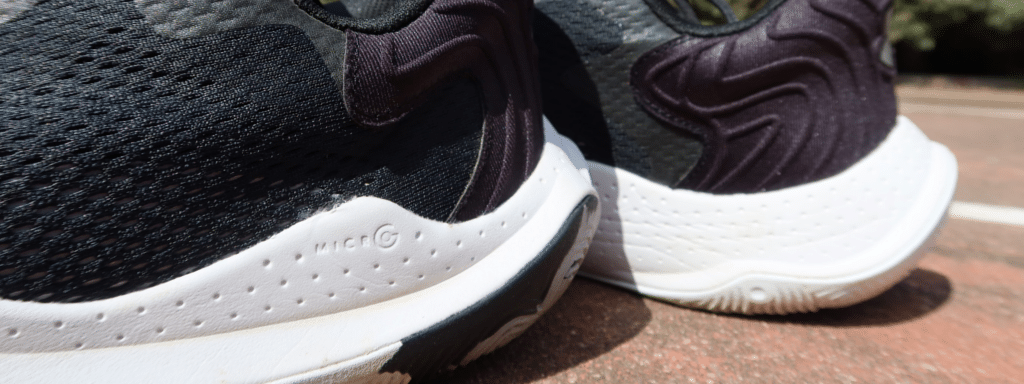
The cushion was my favorite part of the Under Armour Spawn 4. The shoe features full-length Micro G cushioning, which is great.

The foam took some time to break in. It started off stiffer, but the longer I played with them, the foam became softer and softer.

The Micro G is shaped like a wedge which might take some getting used to. The setup is thicker in the heel, which is also rounded, similar to the air jordan. This build is obviously meant to assist players to step into their shot. The thicker foam absorbs the impact of your heel strike and then its rounded shape rocks you into your jump. You do feel slightly tilted forwards when wearing them. It isn’t an issue but it is a peculiarity.

Under Armour Spawn 4 Materials

Under Armour Spawn 4 materials

The shoe’s materials are, at best, basic. Others might call them cheap. And they are one of the main differences you will find between the Curry flow 9 and the Spawn 4.

The upper consists of a flexible nylon woven mesh, with some fuse portions, placed in high wear areas. The heel features a more substantial woven material for extra support and containment.

On the bright side, it takes no time to break-in, it keeps the shoe lightweight and agile, and ventilation is on point. Also, the flexible fabric doesn’t affect containment. I’m 6’3″ and 230 lbs, and used these guys during league play and had zero containment issues. So, take that for what it’s worth.

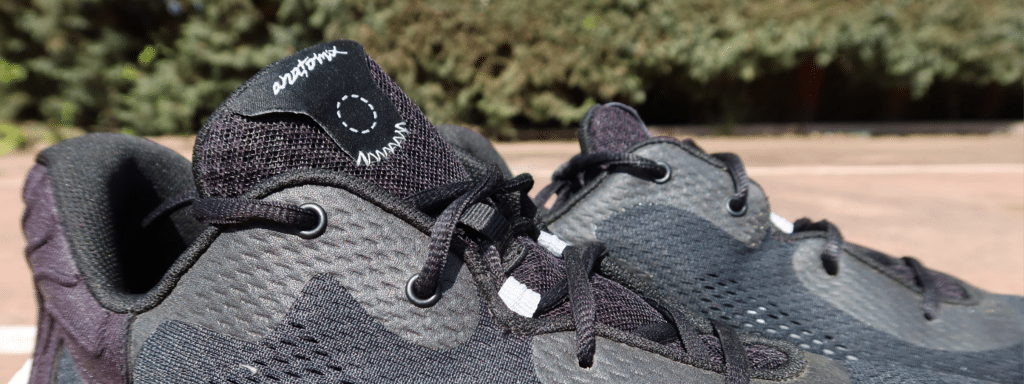
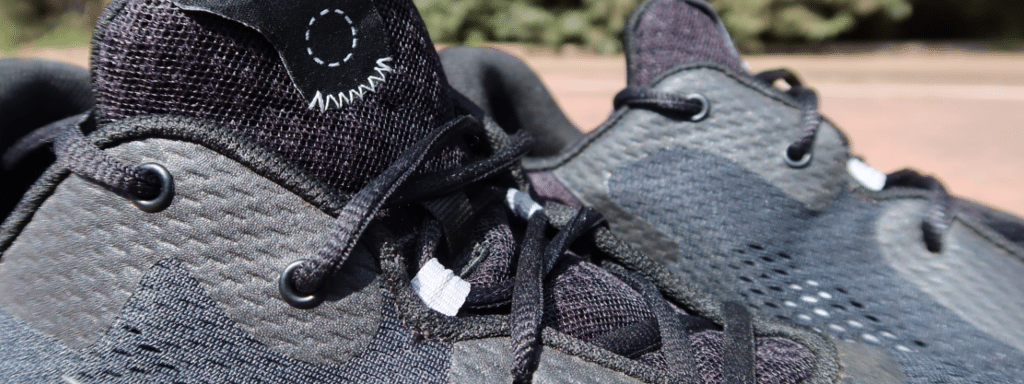
One detail I did like was the metal eyelets towards the top. I tie my laces tight and usually cut right through mesh lacing systems.

Under Armour Spawn 4 Fit

Under Armour Spawn 4 fit

Ok, for me this was the worst part of the shoe by far. I ordered my Under Armour Spawn 4s in my usual size 12, and I am certain I could have easily gone down half a size. There is significant dead space in the toe area, and they felt very loose.

Also, the lacing system features 2 lace cables on either side of the shoe, that help maintain your foot on the footbed. On my right shoe, I had no issues, on my left, however, it cramped my foot significantly the first time I played in them. Again, I like my laces tight, so what I ended up having to do was lace the shoe very tight everywhere except on those two cables, and that helped a lot.

The Under Armour Spawn 4 maintains the “anatomix” construction we’ve seen in previous Spawn models which is supposed to conform anatomically to your foot. It might just be my foot shape but, I just wasn’t feeling the fit.

Under Armour Spawn 4 Support

Under Armour Spawn 4 support

The shoe has no remarkable support features, which in a way makes the shoe’s support somewhat remarkable. There is no shank plate, which keeps the shoe feeling agile and fluid. You can almost fold these guys in half like a barefoot shoe.

The shoe is rather wide in the forefoot, which gives you come extra stability, but there is no outrigger, and the midsole is rounded on either side.

On top of that, the shoe is also very low cut and has a very basic heel counter. But, surprisingly, everything worked well together, and I had no issues and no feelings of instability.

Under Armour Spawn 4 Overall

Under Armour Spawn 4 overall

All in all, I enjoyed the Under Armour Spawn 4. Is it the best shoe I’ve ever worn? No. But, the Under Armour Spawn 4 has that generic team shoe feel that I love. I feel like I can go all out while wearing them and I feel no remorse in scuffing them or wearing down their traction. And, they perform well enough that I didn’t feel like I was missing out by not wearing some of my better performing and more expensive shoes.

And, I do have to say that when a shoe gets me feeling a certain way, that always gets an extra point in my book. The Under Armour Spawn 4 had me wanting to bring up the ball on offense and lockdown my guy on defense.

2022年4月19日星期二

Puma RS-G Performance Review

 Style meets performance with the Puma RS-G spikeless golf shoe. I can’t deny that the RS-G looks sweet, but how do they hold up on the course? Let’s find out.

First Impressions

The Puma RS-G is basically a carbon copy of Puma’s popular RS-X lifestyle shoes, at least on the surface.

If you didn’t tell me this was a golf shoe, I’d have had a hard time figuring it out on my own. Admittedly, I’ve never owned a pair of Puma RS-X, but have always loved the chunky design. So, I think this pair looks great and its style is definitely on-trend.

Materials

The materials on the Puma RS-G are pretty standard for a lifestyle-inspired golf shoe. A seamless mesh upper provides complete waterproof coverage, and the microfiber leather and TPU overlays provide added durability.

I don’t have any complaints but the materials are nothing special. At $130, you what you pay for. In comparison to the FootJoy Field, which is made with pebbled leather, it’s a big step down. However, the RS-G also costs about $70 less, so no harm, no foul.

Traction

The traction is where I feel that Puma made some compromises with the RS-G. The Carbon Rubber lugs do provide some added traction when compared with a normal air force 1, but they’re not on par with some of the other spikeless offerings I’ve been playing in. I think Puma chose to focus more on making these look good instead of focusing more on high-end performance.

You won’t see any TOUR players in these as they need more grip for their powerful swings. But that’s okay. It’s not made for them. The traction is adequate for the everyday or casual golfer, which is this shoe’s target audience.

Cushion

The Puma RS-G’s midsole is packed with Puma’s proprietary Fusion Foam. I was pleasantly surprised with how plush the shoes felt. A shoe this chunky better feature a lot of cushion, and these hit the mark for sure. The Fusion Foam midsole provided plenty of underfoot cushion along with some responsiveness.

Stability

I can’t knock the stability of the Puma RS-G, either. The responsive Fusion Foam and the wider base provided plenty of stability. And despite the chunky midsole, I didn’t feel the RS-G added any unnecessary height or put me up too high off off the ground.

Fit

Puma says that the RS-G fits really short, and suggests going at least a half size up.

I found this absolutely true. I went with my traditional size and found myself struggling to make it through my round because of how small they felt. The short fit and the moderate heel-to-toe drop caused my feet to cram into the front of the shoes, which wasn’t the most pleasant feeling.

Based on my experience, I think I easily could have done with a full size up from my normal shoe size.

Puma RS-G Summary

The Puma RS-G is what it is; a decent performing golf shoe that’s beautifully disguised as a lifestyle favorite. Serious or competitive golfers should look in a different direction, but those who are more worried about having fun and looking fresh on the course should find the RS-G a winner.