2017年1月24日星期二

How To Replace Air Brake Chambers

How To Replace Air Brake Chambers
1. CAGE SERVICE SPRING. Park your truck or trailer on a level surface, chock the wheels and apply the parking brake. Position a locking pliers against the mounting housing of the failed air chamber and securely clamp it on the pushrod to prevent movement. Release the parking brakes.
2. CAGE PARKING SPRING. Remove the caging tool, also called a T bolt, from the storage tube on the Brake chamber . Remove the plastic inspection plug from the front of the spring-brake’s dome, or pressure cap. Shine a light inside the dome to locate the spring’s caging-tool hole. Insert the tool into the hole and turn it slightly until the T end hooks into the spring’s corresponding notches. Slip a flat washer over the tool’s bolt end and thread on a nut until it rests against the washer. Do not tighten the nut with a wrench unless you’re unable to use the vehicle’s air pressure for the caging process. When the spring is fully caged, the bolt should protrude about 31/4 inches from the dome. If air pressure is unavailable, you’ll need to crank down the nut with a wrench. In this event, do not exceed 35 pounds-feet of torque once the spring is caged. Reapply the parking brakes.
3. REMOVE AIR HOSES. (This procedure is unnecessary if you’re simply installing a new service diaphragm or mounting housing.) Mark the hoses to ensure proper reassembly, then loosen and remove them. Often the hoses will have a swivel fitting at one end and a crimped-on pipe fitting at the other. Remove both hoses at their swivel fittings. If either of these fittings is permanently bonded with corrosion, however, cut and replace the attached hose.
4. REMOVE SPRING-BRAKE CHAMBER. (This procedure is unnecessary if you’re replacing the mounting hosing and spring brake chamber.) Loosen the clamp holding the spring brake chamber to the mounting housing and tap it free with a hammer. Lift the chamber out of the clamp.
5. REMOVE MOUNTING HOUSING. (This and the following procedure are unnecessary if you’re only replacing the spring-brake chamber.) Pull the pin(s) connecting the pushrod clevis to the slack adjuster. Remove the nuts holding the mounting housing to the axle bracket. Use a steel brush to scrub accumulated corrosion and dirt from the bracket’s mating surface, then apply a coat of rust-inhibiting paint.
6. PREP AND INSTALL NEW MOUNTING HOUSING. While the old service spring is still caged, measure the pushrod length between the clevis and the outer surface of the mounting housing. Cage the new service spring by placing it on the floor – open side down – and standing on the housing while attaching a locking pliers to the pushrod. A jam nut should be installed on the new pushrod. Spin the nut down near the housing’s surface. Cut the pushrod so its length matches that of the old one. Use the jam nut to open any damaged pushrod threads. Install a new clevis and secure it with the jam nut. Mount the housing to the axle bracket and torque the nuts to the manufacturer’s specs. Connect the clevis and slack adjuster, and make sure they form a 90-degree angle when fully applied.
7. PREP AIR CHAMBER MATING SURFACE. (This and the following procedure are unnecessary on sealed chambers or complete kit replacements.) Inspect the mating surface of the chamber being reused. Use a steel brush or Emory cloth to scrub accumulated corrosion and dirt from the mating surface. Always replace clamps, bolts and diaphragms that have been in service more than a month, regardless of their appearance. These items are cheap and not worth the risk of failure.
8. INSTALL SPRING BRAKE CHAMBER. Loosely connect two band-clamp halves with one bolt. Lay a new diaphragm bowl-like inside the spring-brake chamber’s open end. Keeping the diaphragm in place with your fingertips, center the chamber on the mounting housing. Drape the clamp over the top of the chambers’ mating surface and gently tap it down. Repeat the procedure with the clamp’s bottom half and thread in its second bolt. Rotate the chamber for optimum access to the air-hose ports and fittings. Closely inspect the clamp to ensure it’s properly positioned all around the chamber, then tighten the bolts equally – moving from one to the other – until the clamp ends are 1/4 to 1/2 inch apart. Apply no more than 25 pounds-feet of torque to them.
9. APPLY AIR, UNCAGE AND LISTEN. Brush a thin coat of thread sealer on each end of your hose fittings and attach them to the proper ports. Release the parking brake and remove the caging tool from the air chamber’s dome. With an assistant using the brake pedal to apply 80 to 100 pounds of air pressure, remove the locking pliers from the pushrod. Listen for leaks. Lacking a helper, you can squirt soapy water on the mating surface then apply pedal pressure. Any leak will quickly generate a lot of bubbles. If the diaphragm hasn’t sealed, you’ll need to repeat steps 1, 2 and 8, locating the trouble spot in the process. Finish by installing the dome’s dust cap and securing the air hoses with plastic ties so they don’t rub against any hard surfaces.
2017年1月19日星期四

Replacement High Quality SAF HOLLAND Landing Gear

  • Reliable, high-quality Trailer landing gear seal keeps water out and extends life
  • NAFTA Compliant
  • Industry standard TTMA mounting plate
  • Gearbox with low-temperature premium lube provides easy cranking and reduces component wear; protection from -65ºF to 225ºF
  • Low Speed Gear – 34.4 turns per inch
  • High Speed Gear – 4.5 turns per inch
  • 17″ of travel
  • Exclusive Floating Nut design for high side-load capacity and reduced dock-walk damage
  • 80,000 psi minimum yield upper housing and retractable tube
  • Three-gear train gearbox handles normal loads with 40% less effort
  • Exceeds all AAR M-931 and all TTMA RP-4 performance specifications
  • Includes an industry leading 5-year warranty
Product features:
  •  Using low temperature chassis lube, the gear box works well from -30°C to 120°C;
  •  Works flexibly with grease lubricant on the jack screw;
  •  Double speed designed for better efficiency;
  •  Wider backing mounting plate for greater load bearing capacity and longer service life;
  •  Multi-type shoes available for different usage;
  •  Reliable, high quality seal keeps water out and extends the useful life;
Product functions:
  •  The device is used for semi-trailer landing gear and special trailers.
  •  It can lift and support the trailer when separated from the tractor.
  •  Used for all sorts of trucks securely working as hydraulic jacks.
  •  The quality is up to the standard of American ABS specification.
  •  Please adjust to slow speed when loading, high speed is forbidden, otherwise it may injure the landing gear.
Attention(outside landing gear):
  •  Only use low speed gear when the base ground raise the vehicle, high speed gear are not allowed to be used.
  •  Confirm the gear meshing completely when the handle is hung on the hook. Avoid the condition that the gear is in the neutral position when the handle hung within the hook.
et is suitable for the majority of applications in the trucking industry. The floating nut riser helps resist the stresses of dock walk found in some air suspensions. Features a 50,000 lb. lifting capacity, 27,000 lb. side load capacity and a 140,000 lb. ultimate load capacity. Includes: 51000 series tandem gear set, universal style crank handle and cross shaft.

2017年1月12日星期四

Adjusting a Bendix Air Governor

Adjusting the Bendix D2 governor just takes a 7/16 wrench and a screwdriver. The unloading pressure for the typical air brake system is 120 psi but it can be higher up to 130 psi without a problem. Anywhere in the middle is good in my book. This is an easy adjustment as you can see in the video.
The adjustment is touchy and to increase unloading pressure you turn the screw clockwise and counter clockwise to reduce pressure. When the air breake valve compressor reaches it’s limit the governor is there to unload it preventing air pressure from building too high. For you seasoned mechanics this is very elementary information but for those who didn’t know how to make this adjustment then I hope this info helps.
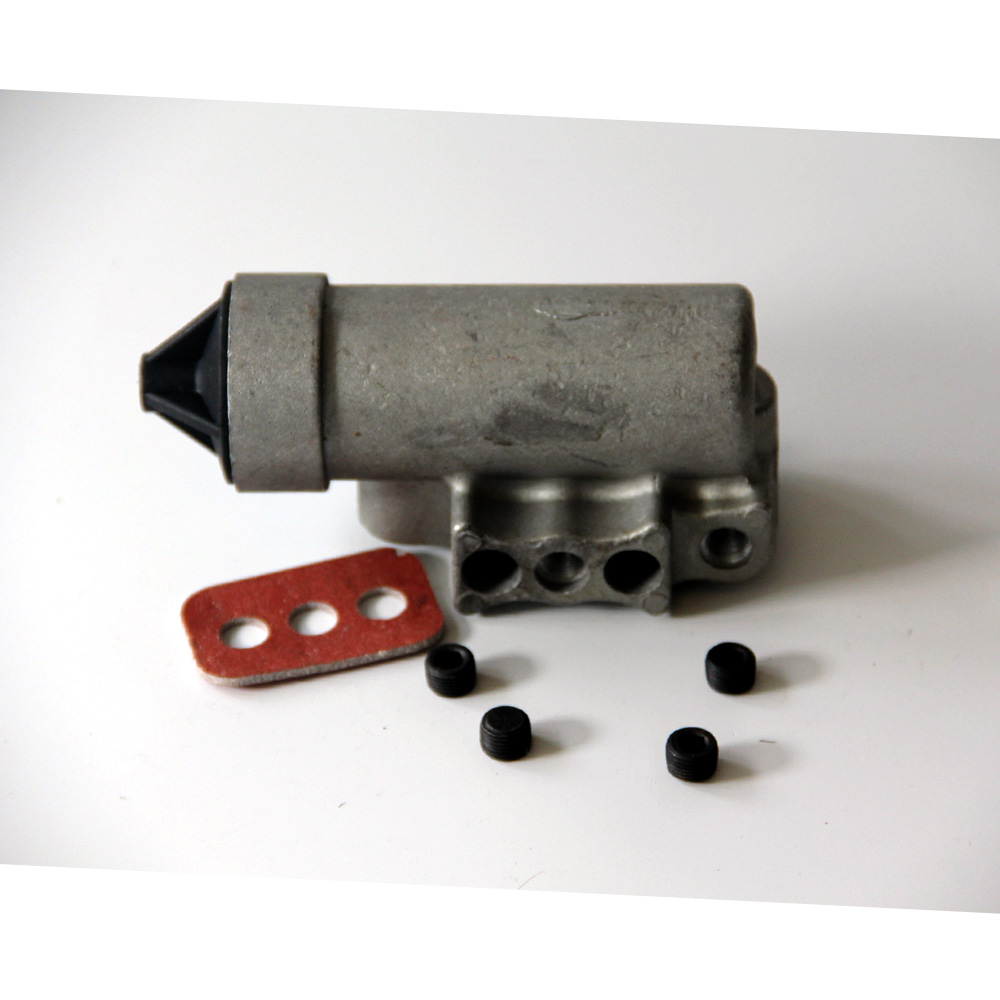
The unloader is located at the air dryer and where the air pressure is directed to when the governor setting is reached. There is an unloader port at the governor that is routed by an air line to the air dryer when 120 psi is reached. What this does is unload all the accumulated oil and moisture that has settled at the bottom of the dryer base.
At 120 psi there is an audible sound of exhaust shooting out the bottom of the dryer housing. This indicates to the operator or the tech working on the air system what pressure the governor is set at. The air dryer needs to be serviced on a regular schedule to clean out the contaminants that accumulate over time.
We service our air dryers every 2 years which includes a dessicant filter and unloader service kit. Also included is a heater that prevents the bottom of the dryer from freezing in the winter time. The AD9 air dryer can be serviced quickly in-frame using a replacement unloader valve assembly that is secured by three bolts. The filter is removed by removing the bottom section of the dryer.

2017年1月5日星期四

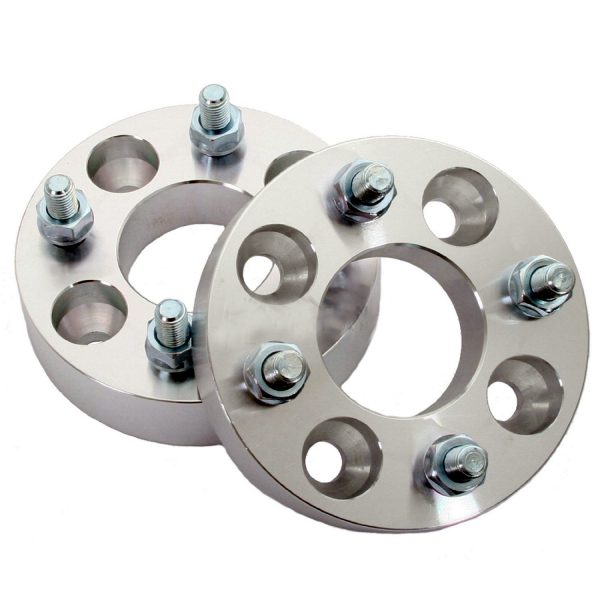
Why choose our 4X100 wheel spacers?

-Made of Aerospace grade 6061-T6 Aluminum Trailer parts
-CNC Machined with 60 degree taper bulge seat lug nuts
-Machine pressed high tensile, heat treated studs
-Grade A lug nuts
Specifications:
Thickness: 1″ INCH OR 25MM
Bolt Pattern: 4X100-4X100 wheel spaces
Thread Size: 12X1.5
These adapters can be used on the following cars, among others:
  • Acura: Integra (86-01)
  • AMC/Eagle: Alliance/Encore (88-92)
  • BMW: 318, 325 (84-91), 320, 323 (79-83)
  • Chevrolet: Aveo (04-08), Chevette (75-86), Cobalt (05-08), Nova/Spectrum (86-89), Prizm (90-03)
  • Dodge: Aries (81-86), Charger (82-86), Colt (93-94), Daytona (82-84), Neon (4 lug) (94-06), Caravan (84-85), Rampage (78-85)
  • Ford: Aspire (94-on), Escort LX (91-01), ZX2 (97-03)
  • Geo: Prizm (90-on), Storm (90-93)
  • Honda: Accord (82-89), Civic (80-07), Civic Hybrid (03-05), Civic Si Hatchback (02-on), CRX, Prelude (80-91), Del Sol (92-97), Fit (07-08), Insight (00-06), Prelude Si (86-96)
  • Hyundai: Accent (00-08)
  • Isuzu: I-Mark (83-89), Impulse (83-92), Stylus (91-on)
  • Kia: Rio Base, LX, Rio-5 (01-08), Sephia, Spectra (94-04)
  • Mazda: Miata, MX5 (90-05), MX-3 (92-96), Protege (90-01), 323-9 (90-94)
  • Mini: Cooper (02-08)
  • Mitsubishi: Lancer (02-07), Mirage (93-02)
  • Nissan: Sentra (83-86), 200 SX (95-97)
  • Plymouth: Colt (86-93), Horizon, Omni (79-90), Neon (4 lug) (96-00)
  • Saturn: Ion (03-07), SC Series (91-02)
  • Scion: XA (04-07), XB (04-07)
  • Suzuki: Aerio (02-07), Esteem (95-03)
  • Toyota: Celica (86-91), Corolla (88-02), Echo (00-05), MR2 (85-89), MR2 Spyder (00-05), Paseo (92-96), Tercel (83-97), Yaris (07-08)
  • Volkswagon: Corrado (89-92), Cabrio (97-03), Jetta 4-Cyl (85-98), Passat 4-Cyl (90-97), Scirocco (81-88)
Our premium quality adapters ensures durability and strength. Price is for a pair (2 pieces).All of our Wheel Spacers and Adapters are made from the highest quality Aerospace grade 6061 – T6 aluminum. Whether  you’re looking to eliminate rubbing, increase turning radius, add spacing for brake clearance, change bolt pattern to fit any wheels, or just want that flush and aggressive stance, our wheel spacers are what you are looking for! Installation is as simple as changing a tire! Our kits come with all accessories needed for full installation. Each of our High Quality kits come with Spacers/Adapters, machine pressed high tensile heat treated studs, and grade A lug nuts. Unlike some of our competitors, we only use machined 60 degree taper bulge seat lug nuts for complete lug centric centering for your security
And if you don't see what you need then give us a call and we can custom make some for you as well.